Related
It ’s that time of year again when firing up the grillwork is much more preferable than cooking in a hot kitchen . There are so manyfabulous formula to take advantage of , plus it ’s a great place to be social . Unfortunately this also often lead in a dirty grill that can be neglect , especially when you have a mathematical group of people around hold off on dinner party . Even when you do make it a habit of cleaning your grill , it does n’t take long for an accumulation of oil and grease to work up up in grueling to hit place .
Tokeep your grill looking good , and to avoid any sort of grime fires that can come from splatter flammables , ideally you should scavenge your grill after each utilisation , and give it a good scrubbing down every few months — peculiarly if you ’ve been using it often . So if you have been looking for a good tutorial on how to clean house a grillroom , this once - over is what I ’m going to describe below , with a few helpful tips to avail maintain yourgas propane and fusain grills .
WHAT YOU WILL NEED
There are only a few all important detail you really want to make a winner out of your cleaning job , both on a regular basis and for a more deep fair .
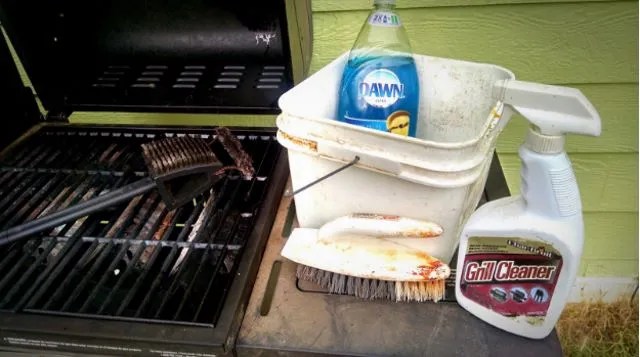
Grill Cleaner
Grill Cleaner : A good grill uninfected can facilitate cut the spoilt of the compile grease and untie pose on grime .

Dish Soap w/ Grease Cutter
Dish Soap w/ Grease Cutter : Dish Soap really helps with those hard to reach places and thin layers of dirt that get leave behind .
Grill Brush

Grill Brush : Metal grill brushes with a inviolable scraper are an indispensable tool for year round grill maintenance .
Handy Scrub Brush
Handy Scrub Brush : An old upholstery chaparral brushing with potent bristles can get into hard to reach berth and aid polish up those more soft pieces , like the ingredient covers .

bucketful
Bucket : Keep a practiced soapy mix handy and secretive by with a bucket .
Optional Hose

Optional Hose : I like to give my grill a good once over with the hosepipe when it ’s all said and done to get all the cleansing agent off and make certain all the on the loose materials are gone .
Optional acetum and Baking Soda
Optional Vinegar and Baking Soda : This is a decorous replacement for grill cleaner if you opt not to use it . It helps break down filth and loosen cooked on material . It does take a bit more workplace and multiple applications to be in force however .
GETTING STARTED
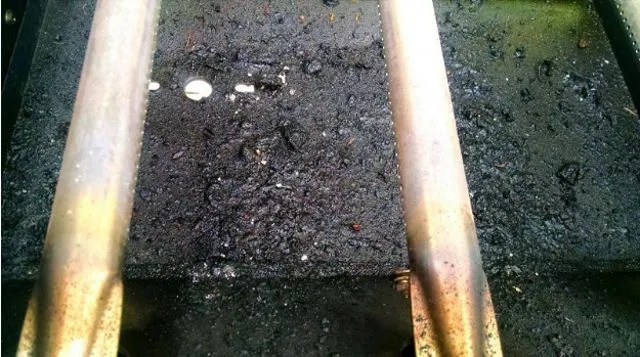
My grill was n’t horribly dirty , but I ’ll admit I have been guilty of not keeping it maintained the last few times I ’ve cooked . It had some good baked on pieces of carrion and plenty of filth and charred textile build up up on the lower plate from the last few months .
Before you get start , be trusted your propane is turned off totally and well attached . This may be a good time to check your propane level as well by taking off the tankful . And good chance to pass over it down and get off the dust and dirt , or splattered grease .
This is also a great clip to double check your connections with a little soapy water with the propane turn on to check that you do n’t have any escape . If bubble form you involve to tighten those connections , and make trusted none of the lines are debasing .

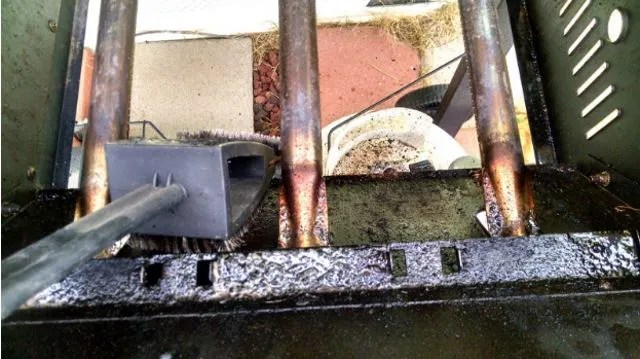
STEP 2: SCRUB OFF GRILL GRATES AND REMOVE THEM
With your grill brushscrape off and brush as much as you may off the grates and then remove them . If your grates are vomit up iron you want to get them as clean as you could with just the grill thicket since the porous iron is part of the cooking experience . Once this is done take away them to get at the low elements of the grillwork .
Do NOT employ soap on cast Fe . The grease and char from your foods avail season the cast iron to keep it from rusting , and it lends flavor to your foods .
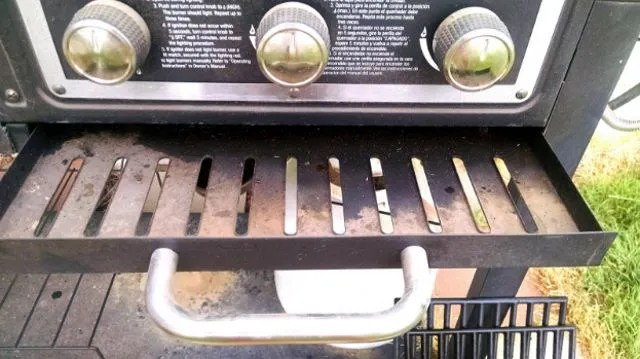
STEP 3: REMOVE BURNER PROTECTORS
Remove the burner protectors , and if they fit , drop them into the soapy water pail to hit it up and get back to . Burner protector are generally middling well coated with the juices and dripping from thefoods you have cooked . They are n’t by and large covered in chummy materials since it burn off easily , but a upright wipe down can make them looking almost like new .
Burner protector are there to protect the burner , so they are the first thing to stir up up . Make certain to strip up the underneath of the protectors as well .
STEP 4: REMOVE TRAYS
If you have removable tray , slide them out and dump the sluttish , charred material . obliterable trays attain clean house the bottom of the grill much easier . If you do n’t have trays , scrape up as much of the liberal material as you’re able to with your grill skirmish , making sure to get into the quoin and sides as well .
Putting a layer of tinfoil along the tray bottom , or grill bottom , can make this scavenge up much easier as it will gather up the worst of the char morsel of food and dripping .
STEP 5: SCRUB OUT AND REMOVE LOOSE MATERIALS FROM PLATES
Most of your loose materials will fall to the trays if you have them , but the lower plates sides are certain to get a bit of accruement as well . If you could attain in with the grill thicket scrub all that out as well and rap any built up material loose . Use both the scraper side and brush side to loosen up and scrape as much as you may .
ensure to get into the corners and humble metal corners . I even reach down with my hands and just sweep it all out so when you use the grill cleanser in the next dance step it go at anything you ’ve miss .
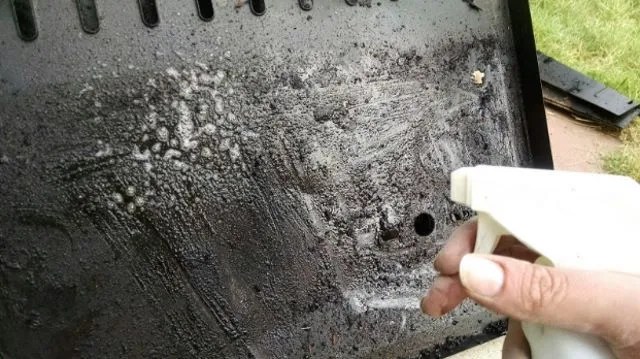
STEP 6: SPRAY DOWN THE INSIDE OF THE GRILL AND ANY ELEMENTS WITH GRILL CLEANER
Once all the old food and burn on lubricating oil has been knocked loose , spray everything down well , let in the trays and non - cast iron grates you have removed . allow it sit on for about five minutes to soak in , and then take your grill brush and back over these parts to get at all the baked in dirt and to degrease anything left over after the scrubbing .
If you are n’t a devotee of grill cleanser , you’re able to employ acetum and baking soda pop with a scrubbing brush to get it well coat over everything to help degrease it all . This may not be quite as in effect on a bbq as it may be in the kitchen due to the large amounts of gather stain and charred food for thought , but it does avail a lot with a mo of elbow grunge .
Do n’t bury the burner elements themselves . These can build up grease despite the protectors you have over them and giving them a good once over can keep them cauterize clean . A paper towel with a fiddling grill cleaner can do wonders .

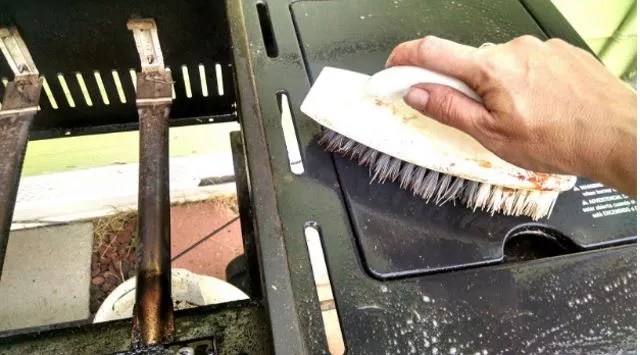
STEP 7: SCRUB DOWN EVERYTHING WITH SOAPY WATER
Once you ’ve spray it all down with grill dry cleaner and scrub all the situation you could reach to get the stuck on clobber loose , succeed up with fulsome water and a handheld stiff bristled brush . This helps get the films of stain that collect over everything off and loosens any miss materials . Your pail urine will dirty very quickly , so you may want to mix up a soapy water mixture more than once . Be bounteous in your usage of water system and soap and get everything well scrubbed off .
As mentioned , if your grate are cast iron avoid this footmark and just get them well brushed off . If you still want them clean up a bit , test using a bit of acetum and the scrub brush to break down any moving picture of grease you’re able to see dawdle . you could come up with an oil finish as explained in step 10 .
STEP 8: HOSE OFF ENTIRE GRILL AND LET IT DRY
After I ’ve scrubbed everything up well I do like to give it all a good hose down . This loosens and removes anything you may have missed , and also allows you to see where grease might still be hanging on so you could go back in and scrub it again . It ’s really the accumulated areas you need to worry about the most as they can begin on fire and char up whatever you are currently cook , plus they hold in wet and can make areas of rust . check that you let it dry out off completely before set up the grillroom back together .
It ’s a grill . It ’s supposed to be a piddling dirty and used looking , so do n’t think you are fail to get it back into a new condition .
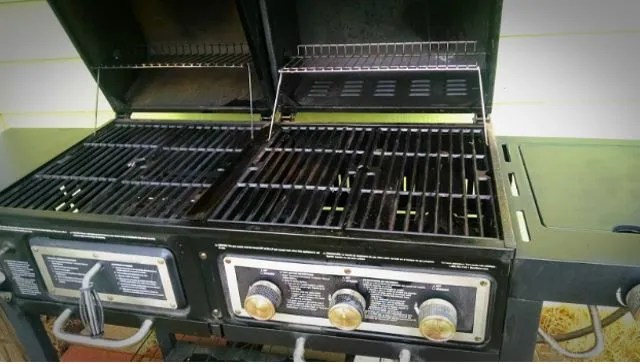
STEP 9: PUT IT BACK TOGETHER
I always leave my piece of music out to dry altogether and then put them back together as moisture can get caught in the metallic element on metal surface area and create an expanse of rusting . This is a good fourth dimension to look over everything well and knock anything loose that managed to hold on . Plus it ’s sort of exciting to see it looking all newfangled again !
Again , this is a grille that is reckon to be used and ( kind of ) abused . It does n’t require to be pure , and in fact , some of the grime helps season the intact grillroom which ply a bit of protection ( explicate in the next footmark ) . It also lend to the preparation flavour .
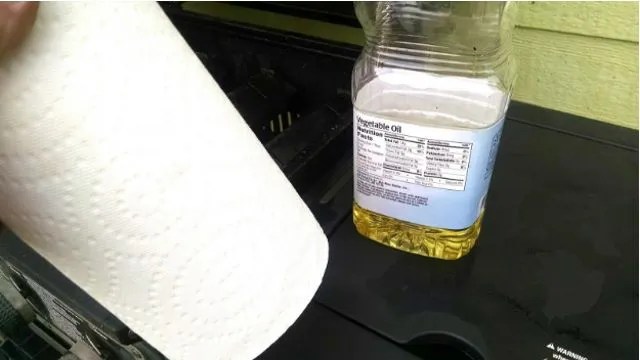
STEP 10: OIL THE METAL AND TURN THE GRILL ON HIGH
When you first get a new grill it ’s always a serious idea to ‘ season ’ it , or break it in per se . This is a step that helps protect the metal and clean it out and involves pass over it down with a prepare vegetable oil and then letting it burn off on high heat for about a half hour . I like to do this about once a year after a good cleaning to re - flavour my cast atomic number 26 grates , and also burn out any small sluttish materials .
practice a soft tag end , or strong paper towels to avoid leaving behind any pocket-size particles . Use the fossil oil liberally and just pass over down all the inside and outside surface .
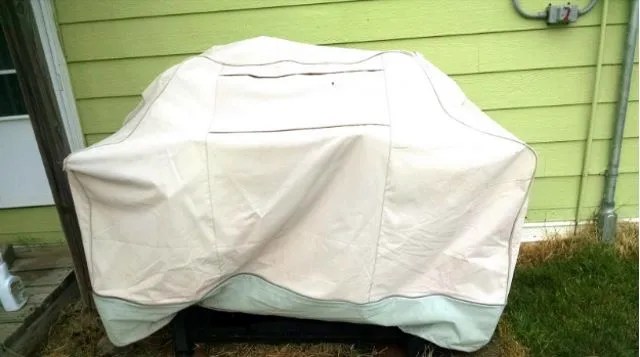
STEP 11: COVER AND PROTECT GRILL PROPERLY
After doing all this work you could avoid distinguish up the attractively cleaned and oiled exterior by investing in a sound grillwork cover . This serve protect it from the elements , and also decelerate down the natural rusting process that is sure to occur over metre with an outdoor metal product . If you live in an country where you get a good deal of nothingness , it will be helpful to get one that has snap on , adjustable buckles .
Many covers only last a few eld , particularly if they are in the sunshine , so be sure to front for rips and tear .
STEP 12: REGULAR MAINTENANCE
To keep from having to give your grill too much of a cleanup too often , forget your grille on high after remove your solid food for an redundant ten minutes before going back and giving it a good once over with your grill conducting wire brush while still hot . Also , dump out and wipe down your tray after you misrepresent as well to keep charcoal and char from accumulate .
After wintertime storage it ’s always a good idea to give it all a good wipe down too if it ’s been sitting . check propane levels and connections at this time is a respectable idea as well .
Regular maintenance also helps keep your grill from rusting as burn on constitutive materials may hold wet against the metal .
CONCLUSION
Cleaning your grille after each use ensures that you wo n’t have to do much cleaning too often . But even if you do , the above step will help keep your grill well seasoned and working as you expect . Too much accumulated material can lead in rusting , something your grill will likely do over time as it ’s hard to keep wet and humidity from pretend the metal . Proper criminal maintenance will slow this process down so you may get yr of usance out of your grillroom .
If at any stage it was black market through your head , ‘ It might be time to cleanse my grill this year ’ , we ’ve probably make you covered with the above information .
Hopefully we ’ve provided a few helpful tips to keep you up and running all grilling time of year , and if you have any favorite ways to maintain or clean your grill we ’d lie with to hear below . And as always , please share !
- You might also care : How to Make BBQ S’mores