This postal service contains affiliate links . Read full revealing statement here .
If you ’re go to ramp up stuff , you need a just bench .
After completing myDIY greenhouse from quondam windowsthis summer , I decided it was meter to at long last construct a proper workbench . I ’ve call for a beneficial array of tycoon and hand dick over the years and ( obvious command come up … ) it ’s far easier to work on project when everything has a place , and the pecker are ready to go .

Make Your Own Workbench
This DIY bench was made usingfree design from Shanty2Chic(I love that land site ! ) .
I ’ll walk you through how I made the workbench and what I ’d change if I was making it again .
If you want the materials inclination , slashed , and gathering information , please inflict Shanty2Chic . It ’s all there .

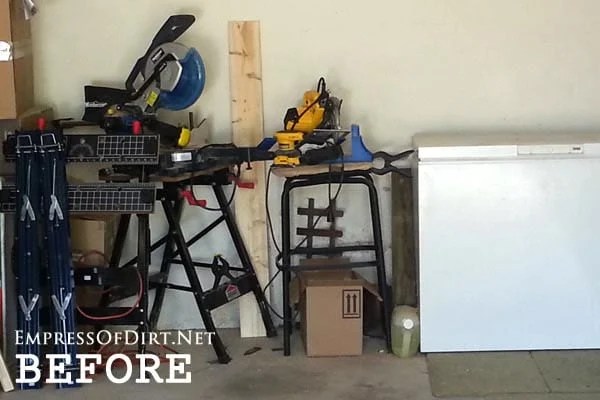
BEFORE
This is no way to work ! As you could see in the BEFORE photo ( above ) , I ’ve been using my chemical compound miter saw on a portable workbench , and some of my other tool are stack on an erstwhile faeces . I ’d set up up various support when cutting tenacious or encompassing pieces of Sir Henry Joseph Wood .
Step One was to build a whole , rolled work bench on locking castor to provide a nice , big work distance . footfall Two ( coming up ) will be a trilled miter regard station .
I think everyone who work up their first workbench says , I wish I had a workbench to use while build this workbench!They are so useful .
Cut Wood and Casters For Workbench
The workbench plans require rough-cut edifice lumber : 2x4x8 and 2x6x8 sticks . The top of the bench as well as the lower ledge can be made from MDF or plywood .
Wood Legs
The bench wooden leg are work by attaching 2x4s to 2x6s . The pocket holes make it simple . Self - rap screw make pilot holes unnecessary . Wood glue ascertain a cosy convulsion .
Workbench Assembly
The workbench is formed by create a frame for the work bench top , a frame for the lower shelf , and then attaching each of them to the legs .
I used 1/2″ plywood instead of MDF add-in or 3/4″ plywood because it was much less expensive .
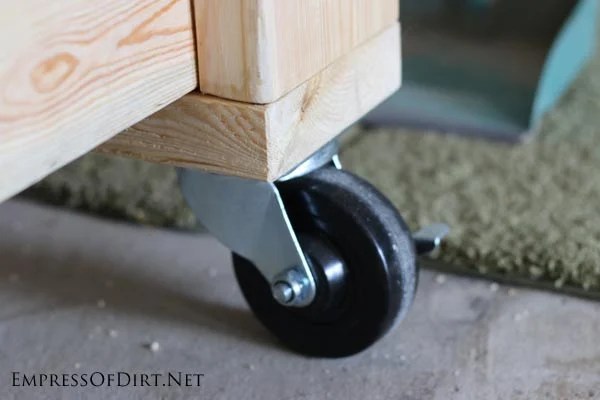
The locking casters ( wheels ) are mounted on wood blocks on the branch bottoms .

Tool Shelf
I was in reality project to add the tool ledge to the wall above the bench , but my old plaster of Paris walls are terrible for hanging brackets , so I sound to Plan B and attach the tool shelf to the workbench instead .
I used a 1x12x8 b circuit board for the tool shelf , and made leg from flake 2x4s . An off cut from the 1/2″ plyboard was used across the back for hanging creature such as hammers .
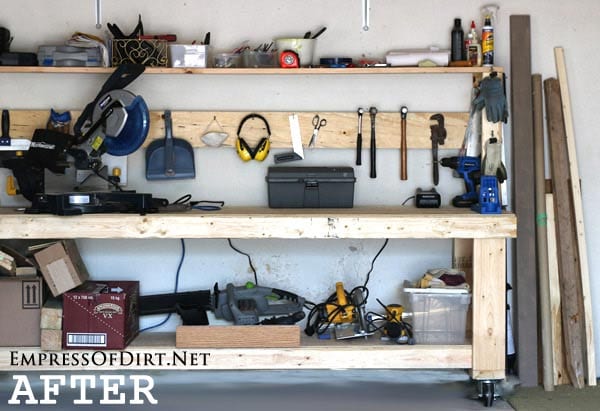
Completed Workbench
I am really pleased with the workbench . If I could change one thing , I would have made it a few inches taller ( perhaps 4 - 5″ ) . I am fairly tall and like a eminent work elevation , though this workbench at 33″ tall does work very well for drilling and other actions where you press down .
I also turn over adding the wheels aslocking , swivel castersare rather dear where I live ( they ’re much less online ) , but the wheels are now a best-loved feature article . This bench is quite impenetrable but it ’s so light to move it around as needed : it just glide on those wheels .
I ’ve got my miter saw on the workbench for now but plan to construct a separate rolling miter joint saw station , customise the meridian to work in conjugation with the workbench . Stay tuned for more exciting projects from the shop !

~Melissathe Empress of Dirt ♛
Next